Green Screen Evaluation
For this project were asked to create a 30 second video in front of a green screen and then we had to use Adobe Premiere CC to put our shots together and edit the whole video by adding different backgrounds and sound effects. This was the first time our class have ever used a green screen so this was just a small introduction to it.
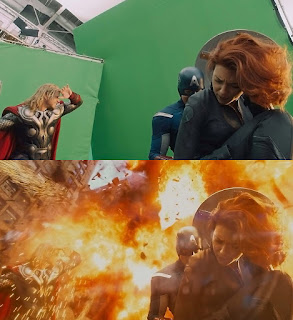
 For my primary research I went online and searched for popular movies which used green screens in a very creative way as they added things such as explosions to make the movie more interesting and dramatic. For my secondary research I look at how they create these green screen effects and how they make it look realistic and also for my secondary research I research about diegetic and non-diegetic sounds. Diegetic sounds are the sounds that are visible on the screen which shows something happening in the scene that uses sound in it such as:
- Voices of characters
- Sounds made by objects e.g- footsteps, kettle, raining sound, thunder, cars, etc.
- Music coming from instruments in the story
These sound can either be on screen or off screen as long as it has an impact to the movie with the realistic things that are happening in there.
Non diegetic sounds are used to demonstrate the emotions in the scene such as adding music in the background to make the movie dramatic.
Non-diegetic sounds are the sounds that are not visible on the screen and is not implied to be present in the action and these include:
- Narrators commentary
- Sound effects for dramatic effect e.g- horror music to make it scary or sad music to set the scene
- Mood music
- Voice overs
I was placed in a group with Dan, Beth, and Victoria and we decided to create a horror short film where Dan was wearing a mask while Callum, who was the other actor, pretended to run in the short film as if he was running away from the killer which was chasing him in the forest. I named the short film 'The Chase' as we all edited our own version using Adobe Premiere CC and then put them on YouTube.
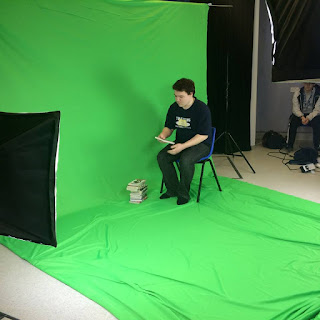
The whole class went up to the studio and then each group went up to the green screen and filmed our scenes in 20 minutes using all the props that is already there and also props we brought in ourselves so we can have a theme for our short film which we are going to create. The props we used were two big lights placed in the correct are to make sure there are no shadows, the green screen so we can add a different background to the video when editing, a video camera to film our shots, a tripod to hold the camera still, and the props me and my group brought ourselves which was a chair and a mask to indicate the killer.
 Over all everything went well as Callum and Dan were the actors while Victoria, Beth and I were the directors as we told them what they should do. Also Victoria and I handled the camera and the shots to make sure the whole shot is in the frame and that the top half is not cut out.
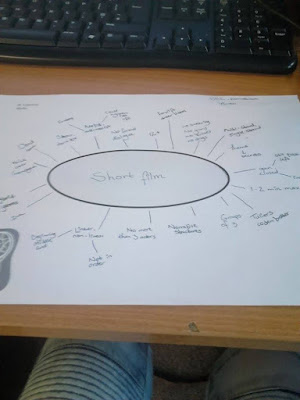
  I created a brainstorm which I made to have some ideas for the theme of our short film. We finally decided to make a horror short film and we also decided to make it realist as this chase could happen in real life and also it is linear as it has a beginning, middle, and and end in this specific order. I also added diegetic sounds such as the footsteps of the mad running away from the monster and non-diegetic sounds such as the intense music playing throughout the chase which adds climax to the short film.
 When all the filing was done, I then went on to Adobe Premiere CC and edited the video and I did this by going on to file>new>project which came up with this box and from there I started creating the new project which I named the Green Screen Film and made sure the capture format is on HDV. Then I went to file>import which imported all the shots I needed to put together the film and when I imported my videos, I dragged each shot and placed it on the screen so I can edit each shot by cutting out the bits I do not want to use in the short film. I then went on effects>Keying>Ultra Key and selected the key colour and pressed the background of the shot to make it black. Doing that I could now add any background I want which will look realistic. After I made the background I added the same background to all of the other scenes where Callum was running but I added a different background for Dan who was the killer in the video to show that he is in a different are than Callum.
To add a title in the video I went on to File>New>Title, which came up with a new tab and gave me a choice of different fonts, colours, and transitions for the text I want to insert. When I finished adding the background on all of the shots I decided to add a title at the beginning of the video which faded in slowly with the title 'The Chase'. Then I added a different font and white outlines on it to make it stand out and to match the theme of the video and when I added my title I decided to add the credits to show which bit each person in my group worked on such as directing and actors. When I did this I added a transaction which makes the text start from the bottom and move up slowly until it disappears. To make my short film better I added music and sound effects as I found it on YouTube then imported it to the video and when I was done adding all the music and sound effects, I changed the volume on all of them so they would not be too loud or too quiet and then faded the music at the end so the volume on the music would slowly go down. When I was done editing my whole video, I exported it by going on File>Export>Media and the format was H.264. After everything was finished, I then uploaded the video on YouTube so everyone can see the work I have created. https://www.youtube.com/watch?v=mzAfL6XSHOs.
Overall I feel that my work went well as this was the first time I have ever used a green screen and I also used different editing techniques I have never used before.


